OK, so you are following these instructions possibly because you have tried to do a portrait and it wasn't very successful and maybe you're just needing a pointer or two. If that's the case then all the tips I'll be telling you from Jane's Perspective should help. If you've never done even a drawing of a face, I'll try to include lots of the basics and you can go find tons of books and instruction takes with the drawing basics BUT that said, even though it's nice to know the basics you can STILL jump right into the painting and be pleasantly surprised with the results.
When I do a portrait I begin with the eyes for two reasons. First of all, the eyes are the windows to your soul and the key to the positions for everything else on the face. Secondly, if you get the eyes right everything else will just fall into place.
From your initial sketch and the fact that (hopefully) you painted AROUND the eye space, you can still see where the eyes need to go. If the face is still wet you may find it easier to do the shadows and highlights that you see around the eyes with a very small brush FIRST and then let the eye dry to do the details. Test it yourself and see. If you get the shadows and highlights around the eyes done (like you did all the fleshy areas except using a much smaller brush) and then you start painting the pupil and whites of the eyes and they just blur into the paint, then let the face dry before this next step.
And this step (my Jane's Perspective first step) is to paint in the colored iris of the eyes. You can test the correct color by dabbing a bit of the color on the plastic baggie that holds your photo. Once you have the round iris painted in, stop and walk away from the painting, turn and look at the face. Are the eyes looking where they need to look? Or are they too close, too far apart, or even cross-eyed? Are they too big or too small? If all you have is the iris you can easily correct by enlarging one side, moving one side over, or correct them by adding the whites of the eyes making adjustments as needed.
Still off? Go back to the basics. The distance between the eyes is the length of one eye. Use your paint brush as a measuring tool or actually use a ruler. You can get the irises to be the right size this way also. AND don't forget to measure from the photo. Sometimes people's eyes are close set or wider set. Whatever the proportion is in the photo should be the proportion in your photo. If the eye is 1 1/4 inch across in the photo for one eye (five 1/4 inch sections) and 1 1/2 inch across (six 1/4 inch sections) for the other eye, then your eyes should be proportionate (however you measure) so that one eye is 5 parts across and the other eye is 6 parts across. Make sense? E-mail me, I'll try to walk you through it.
Once you get the iris and whites of the eyes in their correct spaces add the dark pupil (and here is one of the only places I let you use black in your portrait ( too much black on a portrait and you'll never get those shadows to show up and without shadows your portrait will look flat and amateur). Jane's Perspective says that if you want the eyes to look deeper or more sincere (picture the cat from the movie
Shrek) then you can
exaggerate the size a little.
Now look at the photograph really good and note the actual shape of the iris. Doesn't it get "cut off" a little at the top and bottom? Basics and science tells us that the eye is actually a ball. This ball has the iris right in the center. What keeps our eyes from looking like they are actually popping out of our heads is the eye lids (both upper and lower). If you haven't already established that these parts of the eye come OVER the eye ball, then you need to bring them into place.
Next, (and you may have to wait for the paint to dry to do this step), take your smallest brush and paint in the eye lashes. Practise with your brush to be able to paint tiny lashes to the top and bottom of the eyes OR (and this is a little Jane's Perspective trick) paint eye liner to the eyes, clean the brush, and pull a tiny bit of the paint up or out from the eye liner to make the lashes. This gives you such a limited amount of paint that you can't hardly help making tiny lashes.
One final piece de resistance (best part) to the eye is to take a tiny amount of shadow color on your brush and shade right underneath the upper eye lid. This shadow pushes the eyeball back into it's socket and keeps you from having that protruding eyeball look.
At this point you can also take the end of your paint brush, dip it in white and CAREFULLY dot it on the eyes (one spot per eye) at the angle from which the light would be reflecting to give the eye that special glisten (another piece de resistance).
Once you get the eyes in place you can use them as your guidelines for everything else on the face. So they need to be as correct as you can make them before you go any further or everything else will be out of whack proportionately.
Assuming that you are happy with the eyes (or at least satisfied enough in your first try to go on to the next step - remember you'll get better with each portrait) you can paint the eye brows. Measure the photo to find out how far above the eye the eyebrow is along with exactly where the eyebrow starts in relation to the eye. You can do this by simply using your paint brush. For example, put the staff end of the paint brush to the end of the eye on the photo. Hold the brush horizontal on the eye and slide your finger to the part of the paint brush that corresponds with the other end of the eye. Hold your finger in place on the brush as you measure in the photo from the top of the pupil to the eye brow. How far is that distance? Half of the distance? 1/4rd of the distance? 1/3rd of the distance?
Next, take your finger off the paint brush. Measure the eye on your painting. Holding your finger on the point that corresponds to the end of the eye, look at the paint brush and estimate 1/4th or 1/3rd of that distance (or whatever the coordinating distance that your found on the photo for your eyebrow - NOTE - this is not the MATCHING distance but the coordinating distance, 1/2 of the distance or 1/3rd of the distance on the painting will not necessarily be the exact measurement as 1/2 or 1/3rd of the distance measured on the photo). Turn the paint brush vertically and make a tiny mark with a pencil or paintbrush to show where the eyebrow should be on the painting.
Now I went in great detail with that measuring thing because it will SO help you get your face "right". Skip these kind of steps and you will be working FOREVER to try to "get it right". Trust me - measuring helps. AND it helps so much that even with that one mark, you can keep measuring and marking until you get ALL the coordinates of the eyebrow and other parts of the face in place accurately.
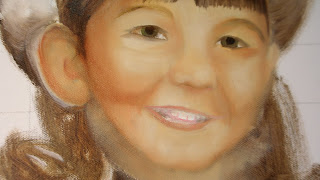
In addition. Line up the straight edge of the paint brush vertically with the side of the canvas to see exactly where the eyebrow should begin and end in relation to the eye. If you held the paintbrush vertically from the inside corner of the eye, you can see if that is where the eyebrow starts or you can readily see that it may start straight up from the iris instead. Take a look at this photo and you will see that I found the eyebrow on the right (facing the painting) eye to start over the iris but the left eyebrow started over a little to the right of the inside of the left eye.
Eyebrows are tiny little hairs so paint them as such and don't give your face those Joan Crawford eyebrows. Paint tiny little hairs like you did the eyelashes, making the hairs grow away from the center of the face. If they look too "hairy" or thick you can go back and paint flesh color from the brow down into the hairs to make them smaller. (That was just a little extra trick - no extra charge, thank you).
Likewise, measure one eye on the photo and see how many eye lengths the nose is supposed to be. You already know that it should be half way from the eyes to the chin but that was the basic information. Now you need to make it look "right" so measure and make a little coordinating mark on your painting. (A review - if the nose is 1 1/2 eye length's long on the photo, then it will be 1 1/2 painted eye lengths long on the painting). AND if you hold the brush vertically from the inside of the eye or the iris, where does the side of the nose go?
The nose does NOT have lines at the side, only shadows and these shadows should already be in place. The only thing you have to paint (now that your guidelines are in place) is the little balls of the nose. There's one big one in the middle and two smaller ones on each side. Treat the nose as such and you can literally paint a round ball in the center with white and two smaller balls on each side which you can blend into a little flesh or pink color and voila, zee nose.
Add some shadow to the underside (just a little - no mustaches unless the photo calls for one) and a little to the sides and the nose is really easy to recreate.
Use the same techniques to measure for the mouth. Mark it's beginnings and endings and widths and fill in the blanks with a nice rosy flesh color for the lips. Got teeth showing? Yep, you have to paint each one but don't panic. Here's some tricks. Paint each tooth, paint the gums (if they show) and paint a line between the teeth. Yep, it'll look like snaggle-puss BUT you are going to go back to the teeth with a brush that is as close to the exact size of the tooth as possible and repaint it closing up that line until it's just the tiniest bit of a line (you would have needed a 00000 brush to paint it but you have created this tiny line by repainting the tooth, not by trying to paint that tiny tiny line - Jane's Perspective "It's not always what you paint but what you paint AROUND what you paint - aka the negative space". A shadow on the teeth under the upper lip and between the lower teeth and the lower lip pushes the teeth back into the mouth to keep from creating "buck teeth". Dark (almost black) shadows at the corners and more shadows on the side teeth give the mouth its proper curve.
For other details like hands, there are also a bunch of books to tell you the basics like bone structure, etc but if you will just MEASURE like I've shown you, you'll be surprised how much simpler they can be. You can use the eyes again. One eye length equals one pinky fingernail to knuckle, 1 1/2 eye length equals one pointer fingernail to first bend, 1/2 eye length equals how much shorter the pinky is to the ring finger, etc etc, etc.
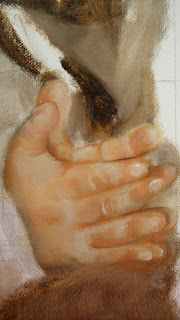
And yes, I use the eye to measure everything so that if anything gets measured wrong or goes out of whack, then I've got the same standard to go to. Instead of comparing the measurements of the eye for this and the measurements of the nose for that (though logic tells me that if I get one right the next one should be right, etc) then I stay consistant.
Hope all of this makes sense. You CAN just wing it and try "eyeballing" your portrait or you can be more accurate and save yourself a lot of "fixing" later by actually USING the eyeball for measuring.
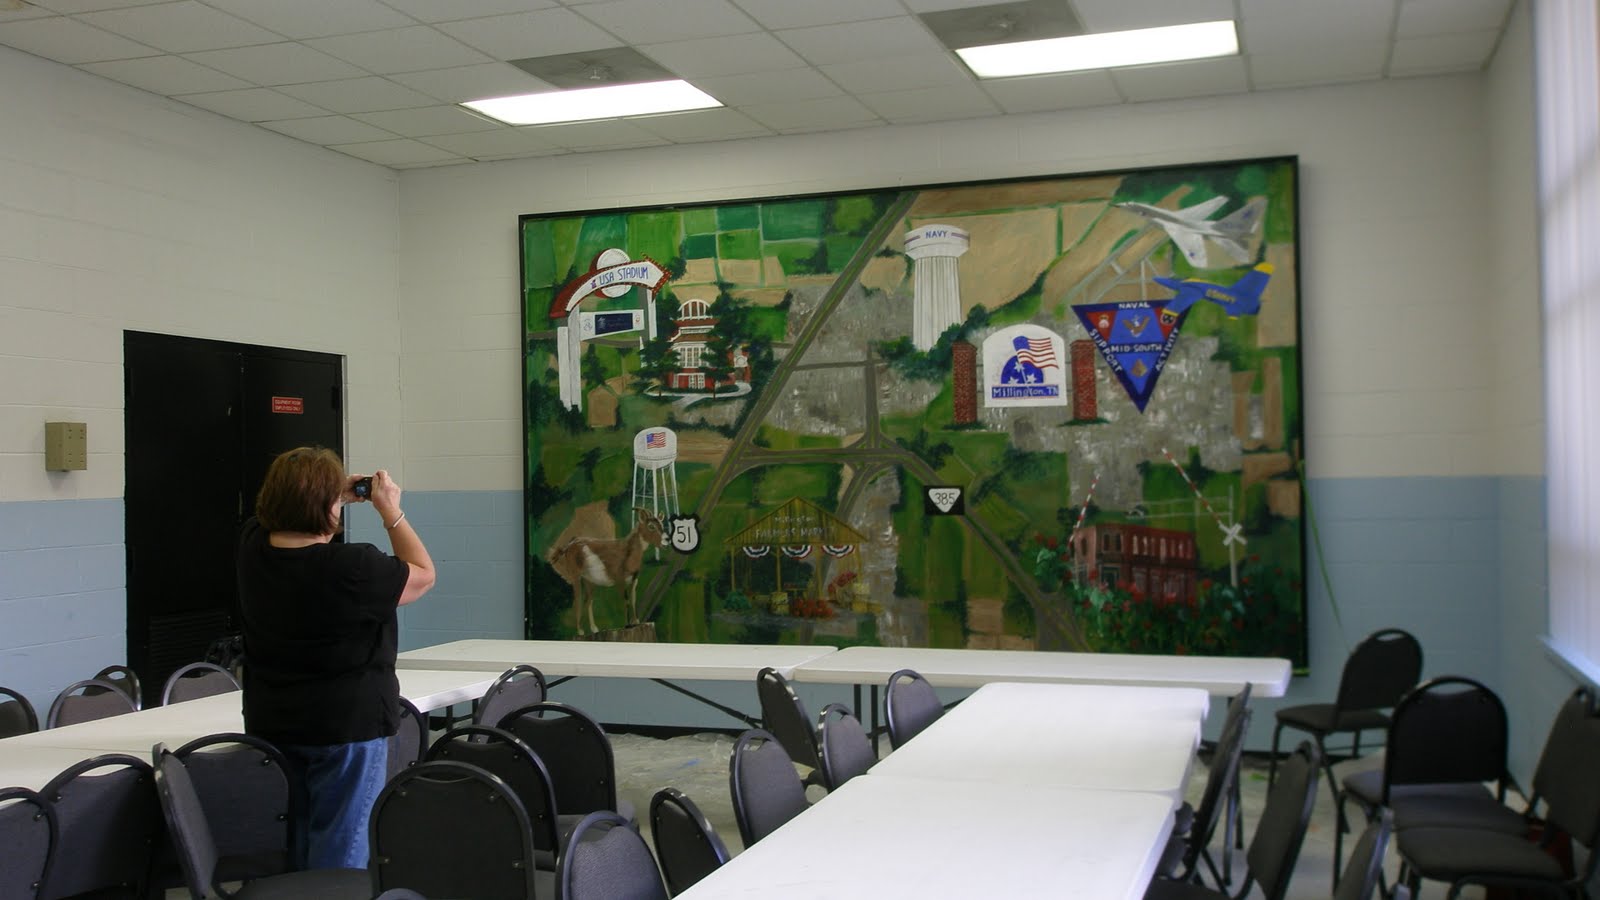
 If you still can't tell how big this piece is by this photo of me standing at the corner, here's Jule photographing the piece with the room tables set up.