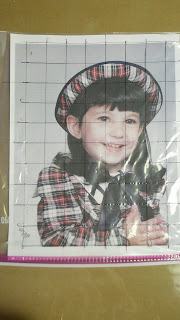
STEP 1. Choose a good clear photo. I've been approached many times to paint a portrait from some of the worst photographic shots and/or blurriest pictures imaginable. I've also been instructed to change the hairstyle, slim up the body, etc. For the most part, after years and years of painting portraits, I can just about please anyone who wants changes but if you are just starting out to create a portrait, I highly recommend that you get the biggest, clearest, and closest to the person photo that you can get. For a first try, usually those 8" X 10" school photos work pretty well. Though the lighting is not the best, you can still get a good handle on the details. If you can't get a good 8" X 10" you can always enlarge the picture on your computer but the more you have to enlarge, the grainier and blurrier (is that a word) the picture is going to get and then you're back to square one on clarity. Here's an example of an excellent photo to work from. Let's take this photo as our example and let me show you the step by step process.

Now, you've seen the photo, here's the finished piece on the easel on the day of completion. But how did it get to it's finished stage?
 Still speaking from a photo choice step, I was given my photo in a frame as you see here.
.
 Whenever you get a photo, you can tell from the commissioner's attitude how precious this photo is so the first thing I do is to scan the photo on my color copier. This way I have a color copy to hold in my paint covered hands as I work. Once I have the color copy I place the original photo and the color copy each, into a large zip lock baggie. This baggie protects the original picture from the messinest of my studio and I'm able to match colors or create a grid pattern on the plastic of the color copy. See the grid on this baggie? I'll tell you moe about that later.