 These divisions are important to know but not necessarily mandatory to know to get started painting a portrait. It's sort of like this. If you know 2 + 2 =4 but your computer says that 2 + 2 =5, then you know something is wrong. The more you know about the divisions of the face, the more you can visualize and correct things about your painting that you might not like or may find "wrong". For instance if the eyes seem too far apart, if you used the measurements of "one eye length equals the distance between the eyes" then you could easily see your error. If you want to know more about these divisions go to LivePerson.com. I'm going to make myself available through them for personalized help on your projects.
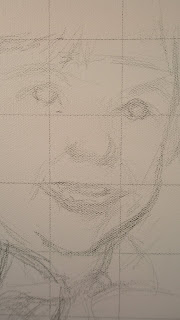
 So, spend a little time studying the proper divisions of the face and start drawing from scratch, OR if "tools and tricks" were good enough for Michaelangelo, then it's good enough for me - so I say let's use our color copy start with a grid method to enlarge our picture. I always use this grid method even though I well know the proper divisions and can draw the picture free hand because in my case, time is money and accuracy is so important - why sweat the erasures when you can start painting quicker with the grid aiding you in the drawing.
The canvas used for this painting was 18" X 24'. My photo was 8" X 10." If I had used a 16" X 20" canvas you can see where griding both the canvas and the photo would have meant 2" squares on the canvas and 1" squares on the photo to correlate. With the 18" X 24" I was able to center and enlarge the picture by making a row of 1" squares at the top and bottom of the canvas. I filled in rest of the canvas with 2" squares. (Make it easier on yourself for a first time and get a 16" X 20" canvas for an 8" X 10" picture or if you are a better math whiz than me, figure out what will correlate to your photo.) You can even make smaller squares in your grid if you are worried about getting even more details exact in the drawing. (Example, each 1/4" square on your 8"X10" photo can correlate to 1/2" on your 16"X20" canvas) Remember, however that this is a painting so the painting is going to be most important. We are just using some handy tools to aid in the initial sketch on the canvas. It's your call, spend a week drawing or do more of an accurate sketch and proceed to the painting.
 Now, back to why you made the scans and copies. I can put the original photo in a baggie and do the next step BUT remember how important that photo was to your subject or commissioner? If you draw lines over the photo even if they are on the baggie you run the risk of making ridges or dents in the photo SO put the copy in a baggie instead and even if the pen or marker bleeds through it won't matter. If the copy gets ruined you can always print out another. In this photo you can see how I've used a fine point sharpie to measure 1" squares on the color copy.
 The next trick is to make sure the photo stays in place in the baggie (you can tape it if you need to) as you begin to draw square by square. So here's my canvas with it's grid again.


